Before you can start selling on Amazon, you need to apply for a new Amazon seller account. Unlike platforms like eBay or Mercari, Amazon requires a bit more information and verification. Amazon verifies these details to ensure a secure and legitimate selling environment. Once your seller account is confirmed, you can proceed to the next steps of your Amazon journey.
To start you will need the following:
Bank account number and bank routing number
Chargeable credit card
Government-issued ID
Tax information (social security number or EIN number for LLCs or other company fees)
Phone number and address
Upload of bills to confirm your address
Once you have submitted all the necessary information, Amazon may schedule an in-person interview to verify your identity and the paperwork you have provided. It’s important to ensure that you submit all the correct documents and information to avoid any delays in the application process.
Understanding the Selling Plans and Fees
Amazon offers two main selling plans: the Individual plan and the Professional plan. Here’s a breakdown of each:
Amazon’s Individual selling plan (aka Free Plan)
Amazon’s individual selling plan allows you to sell your product online without subscription fees. It is the perfect plan if sellers have limited volumes and want to get started immediately. In this Plan, your per item fee will be charged only $0.99 per item which is affordable. It is possible to pay no additional fee for the initial purchase. Just register to buy – simple as that.
Individual Plan:
Pay per sale: 99 cents per sale plus Amazon fees.
Suitable for beginners and those selling fewer than 40 items per month.
Cannot offer free shipping, which may put you at a disadvantage when competing for the buy box.
Amazon’s Professional selling plan
Amazon professional selling plan has added features including bulk upload, inventory control, management features reporting, Amazon advertising, and Amazon APIs for connecting to other apps. These features are not available in Individuals Plans.
Professional Plan:
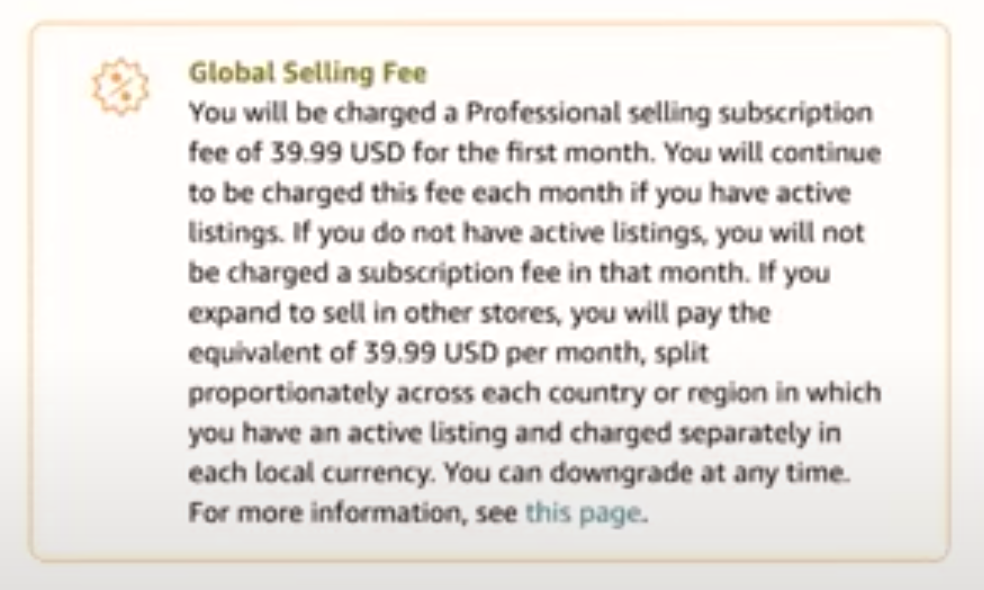
$39.99 per month.
Ideal for sellers who anticipate selling more than 40 items per month.
Ability to offer free shipping, which can improve your chances of winning the buy box.
A professional selling plan offers features that are not offered in individual selling plans.
Additional Benefits Of The Amazon Professional Seller Plan
It’s worth noting that you can start with the Individual plan and upgrade to the Professional plan later if needed. Choose the plan that aligns with your selling goals and budget.
Multi-Category Selling: With the Professional Seller Plan, you have the advantage of selling in multiple categories on Amazon. This allows you to expand your product offerings and reach a wider customer base.
No Individual Item Listing Fees: As a Professional Seller, you are not charged individual item listing fees for each product you sell. This can be particularly beneficial if you plan to sell a large number of products on Amazon.
Bulk Listing and Inventory Management: The Professional Seller Plan provides you with the ability to use bulk listing and inventory management tools. These tools streamline the process of listing multiple products and managing your inventory, saving you time and effort.
Customizable Shipping Rates: As a Professional Seller, you have the flexibility to set your own shipping rates for your products. This gives you control over your pricing strategy and allows you to optimize your profitability.
Access to Advanced Selling Tools: The Professional Seller Plan grants you access to advanced selling tools, such as customizable shipping templates, order reports, and promotional features. These tools enable you to enhance your selling strategies, track your performance, and run targeted marketing campaigns.
Eligibility for Amazon Advertising: Professional Sellers have the opportunity to leverage Amazon Advertising to promote their products and increase visibility. Advertising on Amazon can help drive more traffic to your product listings and boost sales.
Global Selling Opportunities: With the Professional Seller Plan, you can expand your business internationally by selling on Amazon’s global marketplaces. This opens up new markets and potential customers worldwide.
It’s important to note that while the Professional Seller Plan offers these benefits, it comes with a monthly subscription fee. As a seller, it’s essential to assess your business needs and evaluate whether the Professional Seller Plan aligns with your goals and selling volume to make an informed decision.
Choose between an individual or professional seller account
Amazon has two different selling plans for individual sellers. When you sell over 50 products a year, you should be able to get started as a ‘professional’. It will also make it possible to reduce costs even if you sell purely for a hobby.
If your business has a smaller sales volume or fewer than 40 units each month, choose one of their individual selling plan options.
The best way to sell products online on Amazon is to create a Seller Central account. Get all the necessary details in order and you’ve completed this process immediately. This information is needed.
To avoid unnecessary delays and complications, prepare your documentation and information in advance.
Here’s how you can ensure a smooth registration:
Gather Required Business Documents: Obtain the necessary documents, such as a certificate of incorporation, certificate of formation, or letter of ownership, depending on your entity type. Additionally, gather your business’s bank account statement or a letter of ownership from your payment service provider.
Match Geographical Information: Ensure that the business name, address, and phone number on your documents match each other and correspond to the entity type and location.
Separate Business and Contact Information: Differentiate between business information and primary contact person details. They may vary, especially when dealing with a company. Maintain a clear distinction to avoid mix-ups (and confusing Seller Central support reps).
Choose which fulfillment method you’ll use
There are advantages and disadvantages for each method, so look carefully and decide the best option for your business. There are no rules for choosing any one of these. Orders can be completed by Amazon FBM as well as Amazon FBA.
Fulfillment by Merchant (FBM):
You handle all aspects of order fulfillment, including packaging, shipping, and customer service.
Similar to selling on platforms like eBay or Etsy.
No additional fees for FBM, apart from the standard Amazon fees.
Fulfillment by Amazon (FBA):
Amazon handles all aspects of order fulfillment, including packaging, shipping, and customer service.
You send your inventory to Amazon’s fulfillment centers, and they take care of the rest.
Additional fees apply for FBA, including storage fees and fulfillment fees.
Choosing between FBM and FBA depends on your preferences, resources, and the scale at which you want to operate your business. The resources linked above will help you make the best decision for your business.
Now that you have the basics out of the way, you’re ready to embark on a profitable journey as an Amazon FBA seller. Let’s walk you through the exact step-by-step process setting up your account. Pay attention as we provide valuable tips and insights to help you master seller registration.
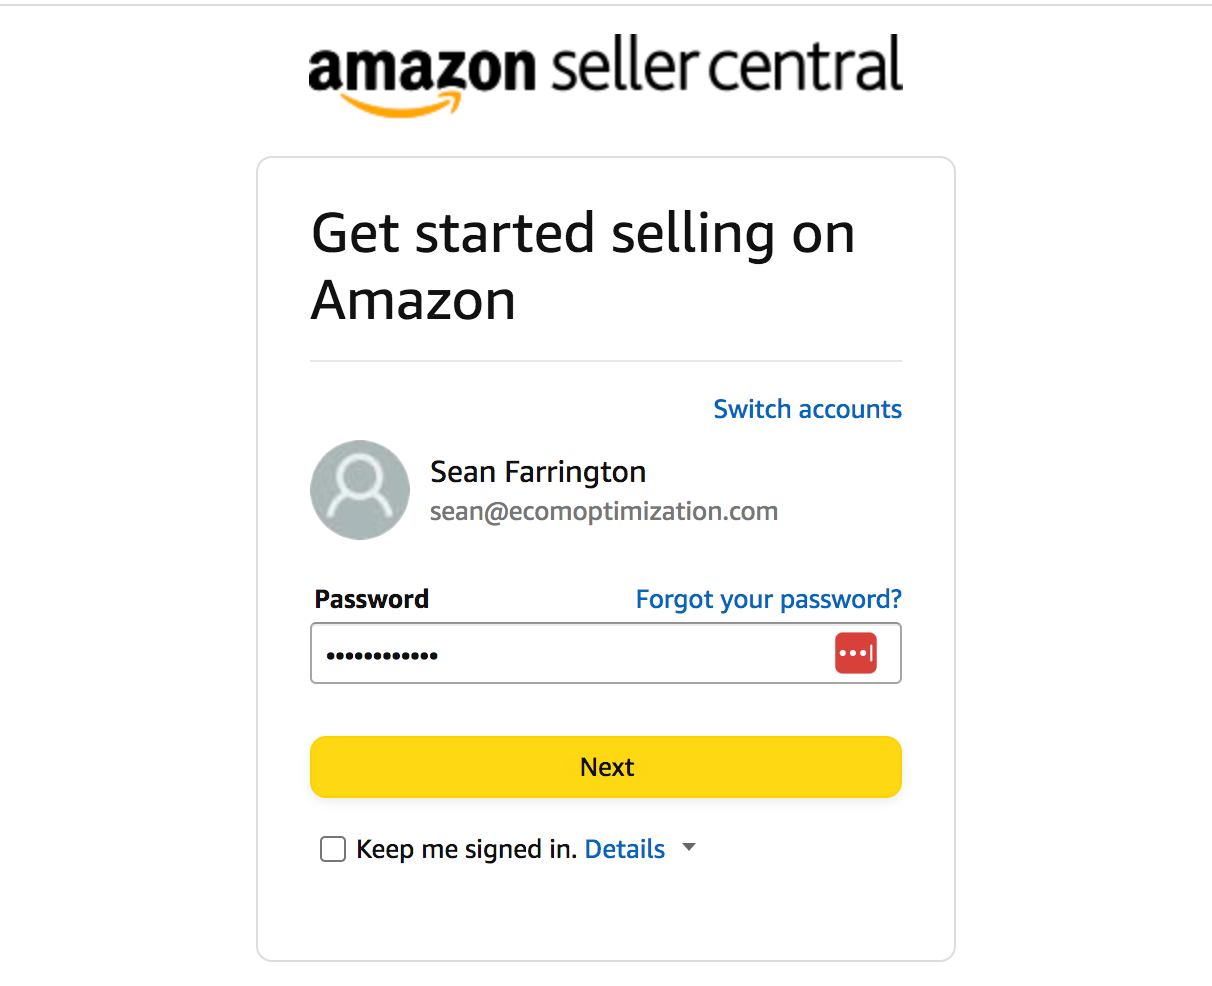
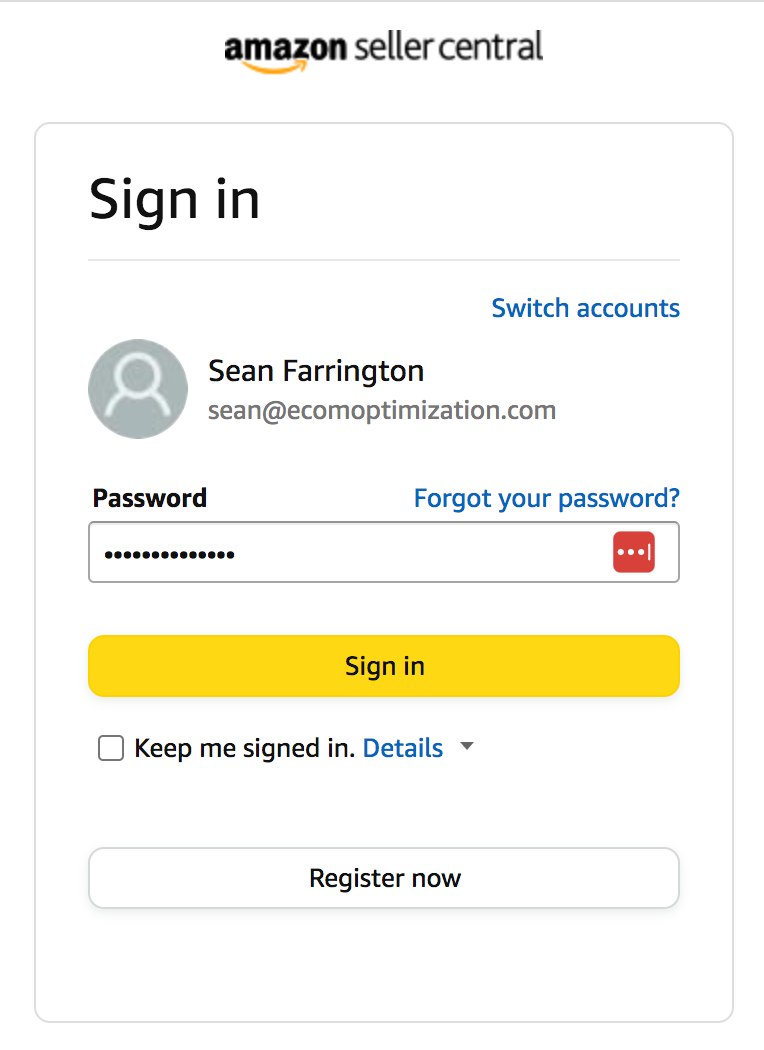
Navigating Amazon Seller Central For Sign In And Sign Up
Amazon Seller Central is the portal where you manage your Amazon seller account. Seller Central is also where you will apply to sell on Amazon. From there it allows you to track sales, fulfill orders, respond to customer questions, and create listings.
Note: The Seller Central app may have some glitches, that’s why for signing up and daily management we suggest using the desktop version offers a smoother experience and greater functionality.
Register Your Account Information
To get started, visit the Amazon Seller Central website and click on the “Sigh Up” button. This will take you to the sign-up page, where you’ll choose the professional account option.
Provide Business and Contact Information
During the registration process, you’ll need to provide your business and contact details.
If you have an established business, use your legal business name and address. Setting up a legal business as an LLC is most common because of the added protection and tax benefits. However, if you’re not ready for a business entity, you can still use the individual account option.
Regardless, you will provide accurate details about your entity, including its name, address, and phone number. Here’s a detailed breakdown of the information you’ll need to input:
a. Entity Name: Enter the official legal name of your business entity. It’s crucial to ensure that the name matches the one on your legal documents, such as your certificate of incorporation or certificate of formation.
b. Business Address: Provide the physical address of your business. This should be the address where your operations take place, and it should match the billing address used on your official documents.
c. Business Phone Number: Input a valid phone number that Amazon can use to contact your business. This number should be dedicated to your business and easily accessible.
d. Website URL (if applicable): If your business has a website, you can provide its URL. This is an optional field, but it can help enhance your credibility and provide additional information about your brand.
e. Product Category: Select the category that best represents the type of products you intend to sell on Amazon. Choose the most relevant category to your product inventory and ensure your products are listed in the appropriate section.
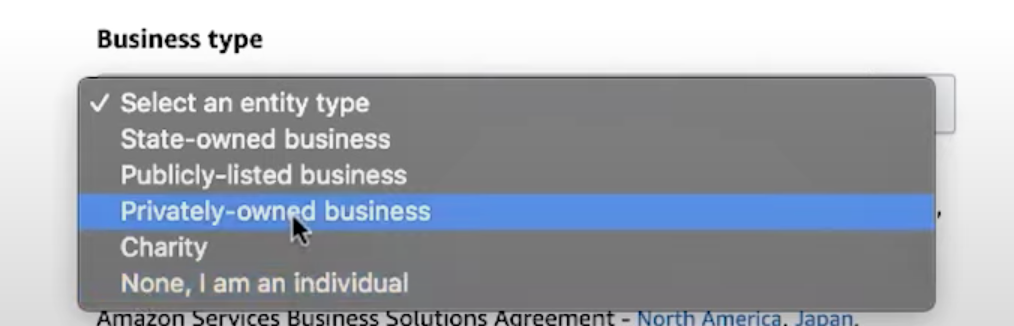
f. Business Type: Indicate the legal structure of your business, such as sole proprietorship, partnership, limited liability company (LLC), or corporation. Select the option that accurately reflects your entity type.
g. Business Tax ID: If applicable, enter your business tax identification number. This could be your Employer Identification Number (EIN) in the United States or a similar tax ID in other countries.
h. Inventory Source: Specify whether you plan to sell products you manufacture or produce (first-party seller) or if you will be sourcing products from other suppliers or manufacturers (third-party seller).
It’s crucial to ensure the accuracy of the information you provide at this stage. Any discrepancies or errors could lead to delays in the registration process or potential issues with your account later on.
Verifying Your Email and Phone Number
Having a legal business name, email and phone number associated with your Amazon Seller Central account tells Amazon that you are a credible and professional business (not a nightmare in disguise). Use your professional email address, or create a professional email address that aligns with your business or brand name. This small but significant step can leave a positive impression on potential customers and set you apart from the competition
After entering your information into Seller Central, you’ll need to verify your email address and phone number. Amazon will send a verification code that you’ll need to enter into Seller Central to proceed with the registration of your new Amazon seller account.
Secure Your Account with Postcard OTP Verification
As part of the Amazon Seller account setup process, one of the crucial stages involves typing in a One-Time Password (OTP) received through a postcard verification. Let’s dive deeper into this stage and understand its significance:
To ensure the security of your Amazon Seller account, Amazon employs a postcard-based OTP verification system. This step adds an extra layer of authentication, preventing unauthorized access and protecting your Amazon seller account from potential fraud.
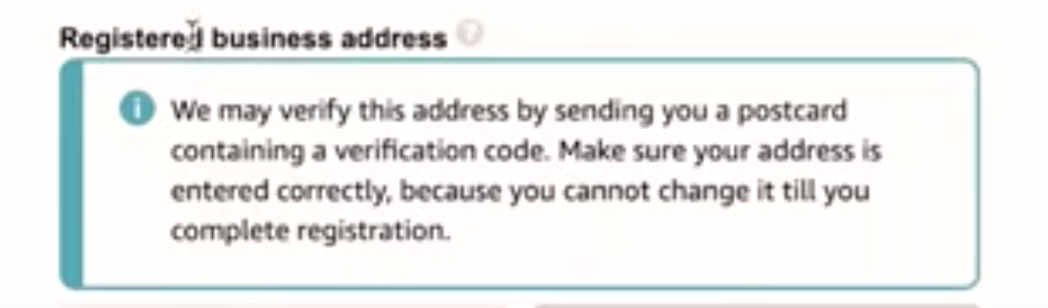
Once you’ve completed the initial stages of the registration process, Amazon will send a postcard containing a unique OTP to the address provided during the business information stage. Here’s how this stage unfolds:
a. The Postcard: After providing your full business account information, Amazon will initiate the postcard verification process. They will send the postcard to the business account address you specified during registration.
b. Delivery Time: The postcard typically arrives within a specific timeframe, which can vary depending on your location and postal service efficiency. It’s important to be patient during this period and ensure that the provided address is accurate and accessible.
c. Entering the OTP: Once the postcard arrives, you’ll find a unique OTP printed on it. Log in to your Amazon Seller Central account, navigate to the verification section, and enter the OTP in the designated field.
d. Verifying Your Account: After submitting the OTP, Amazon will validate it against their records. If the OTP matches, your new Amazon seller account will be successfully verified, and you can proceed with the registration process inside of Seller Central. However, if there is a mismatch or any issues with the OTP, you should immediately contact Amazon Seller Support (right inside Amazon Seller Central) for further assistance.
It’s essential to emphasize the importance of accurately transferring the postcard OTP to your seller account. Any errors or discrepancies may result in failed verification attempts, potentially delaying the approval of your Amazon seller account.
Essential Documentation: Meeting Amazon’s Requirements
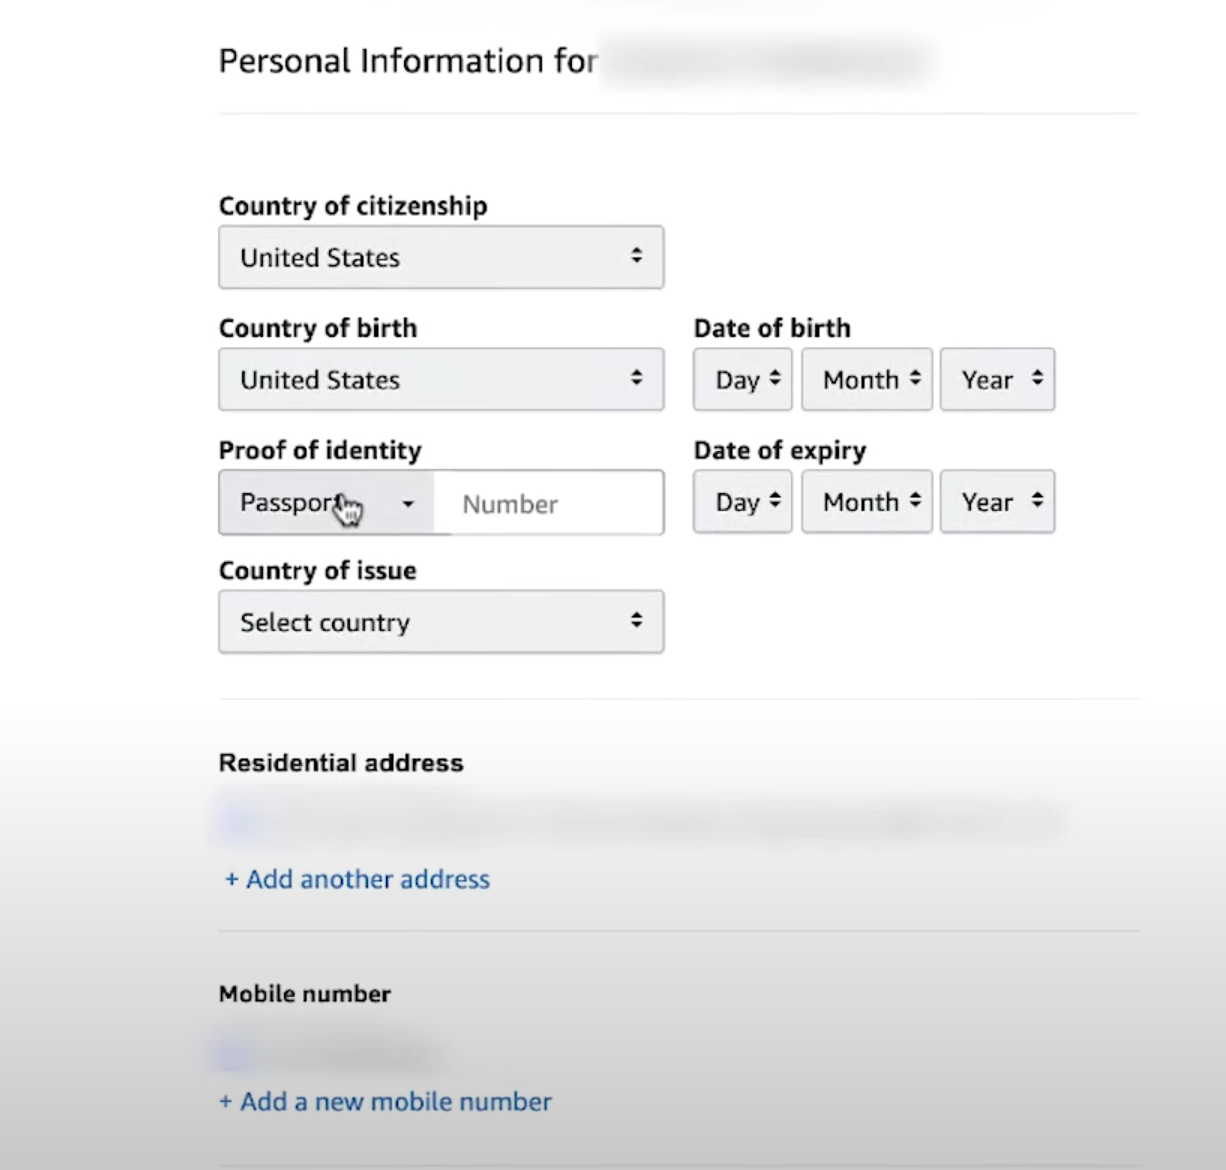
During the registration process, you will be required to provide accurate and detailed information about your business and yourself.
This includes a business name, address, contact details, and a legitimate credit card for payment purposes.
Depending on your business location, you may also need to provide additional identity verification documents such as a driver’s license or passport.
Ensure that all information provided is accurate and up-to-date to avoid any issues with your Amazon seller account approval.
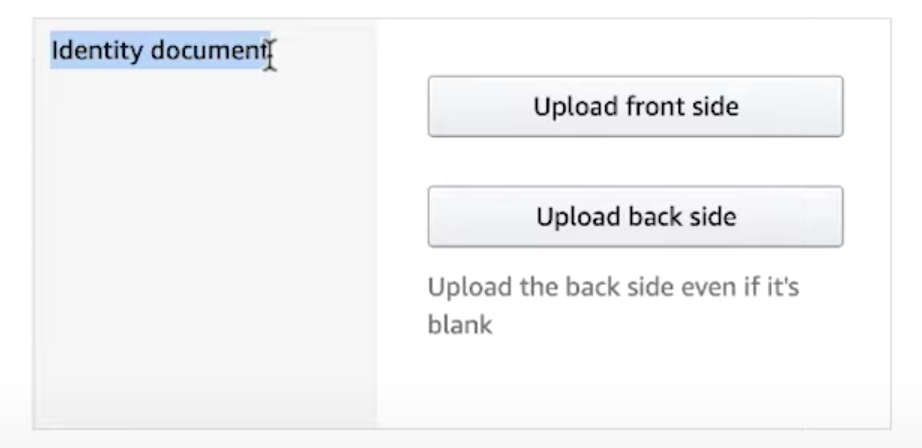
Identity Verification and Document Submission
To ensure the security and integrity of its marketplace, Amazon requires new Amazon sellers to go through an identity verification process when they create an Amazon seller acount. You’ll be asked to submit certain documents such as a driver’s license, passport, or national ID card.

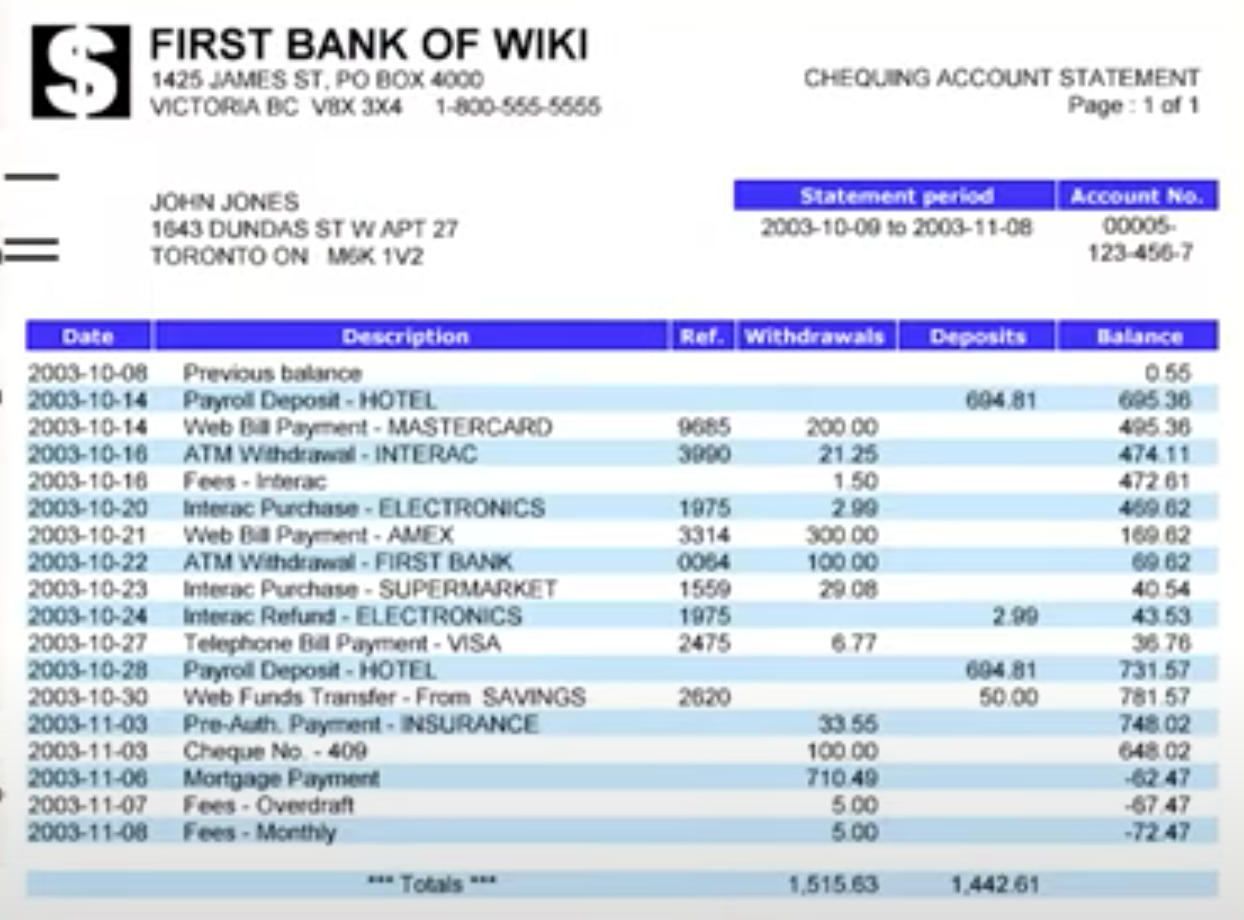
Additionally, a bank statement or utility bill may be requested to confirm your address. Ensure that all documents are clear and legible to expedite the verification process.
Selecting Your Business Type and Store Name
Next, you’ll need to select your business type, such as an individual or a registered company. Choose the appropriate option based on your situation. You’ll also be prompted to enter your store name, which should be unique and representative of your brand or products. Take your time to choose a name that resonates with your target audience and is easily recognizable.
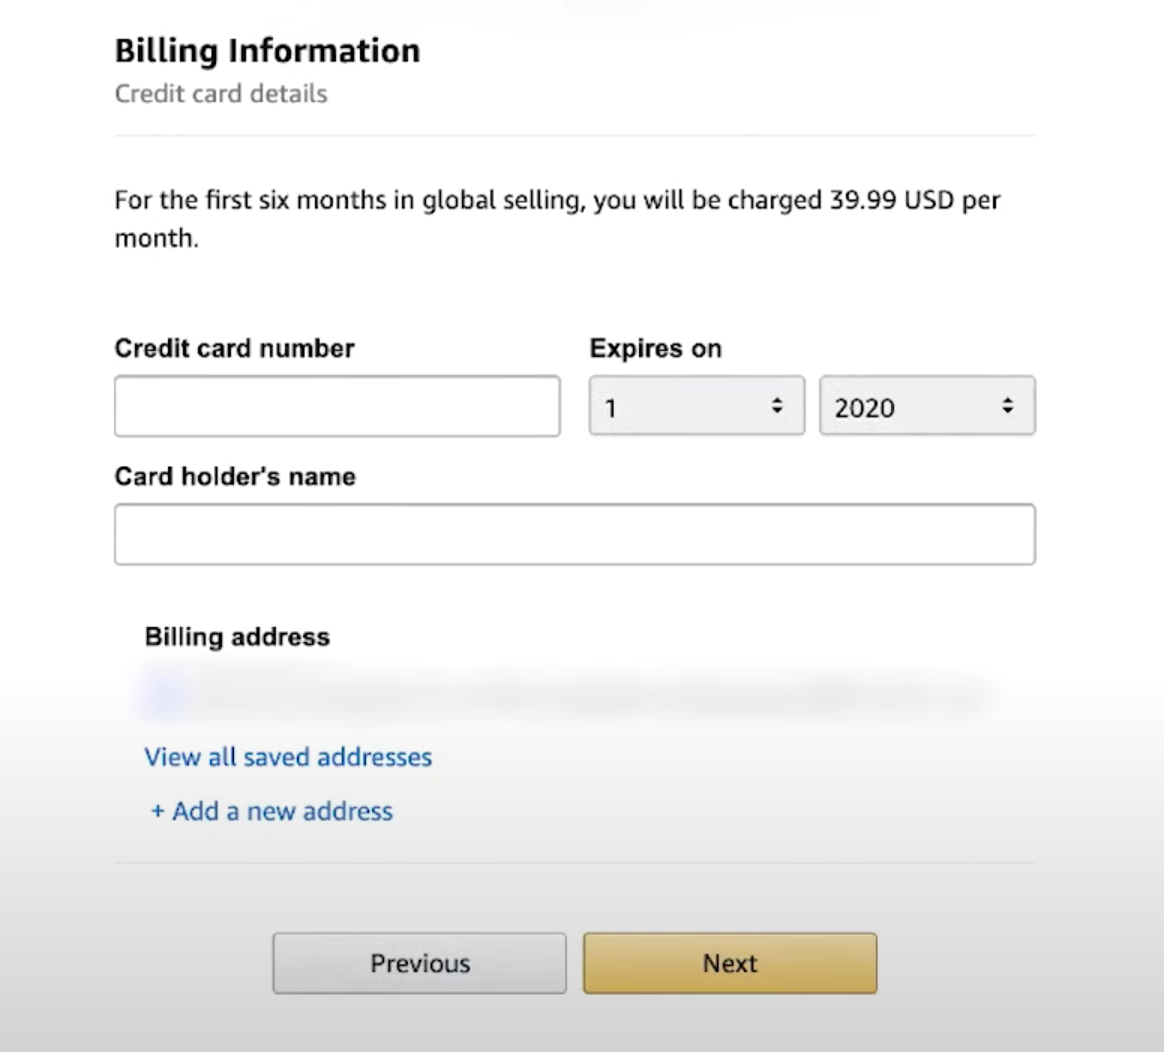
Setting Up Billing Information
You are just a few clicks away from your first Amazon seller central login. But first, you’ll need to set up your billing information.
Amazon requires a valid credit card for monthly subscription payments, advertising costs, and any additional fees associated with your new Amazon seller account. It is recommended to have a credit card with limits high enough to cover potential fees or charges that may arise, such as the $39.99 monthly fee for a professional selling plan and Q4 advertising costs.
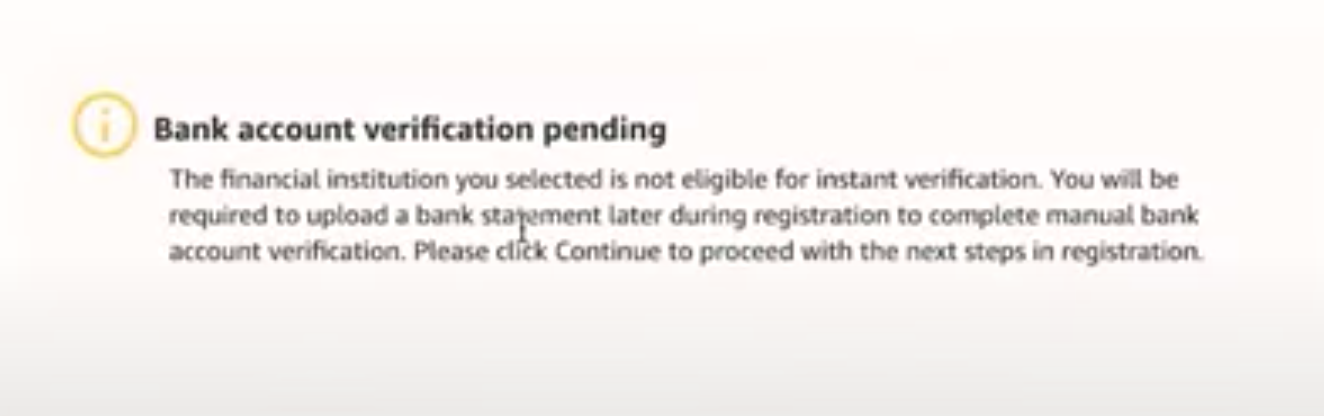
Ensure that your bank account and credit card information is accurate and up-to-date to avoid any disruptions in your financial transactions.
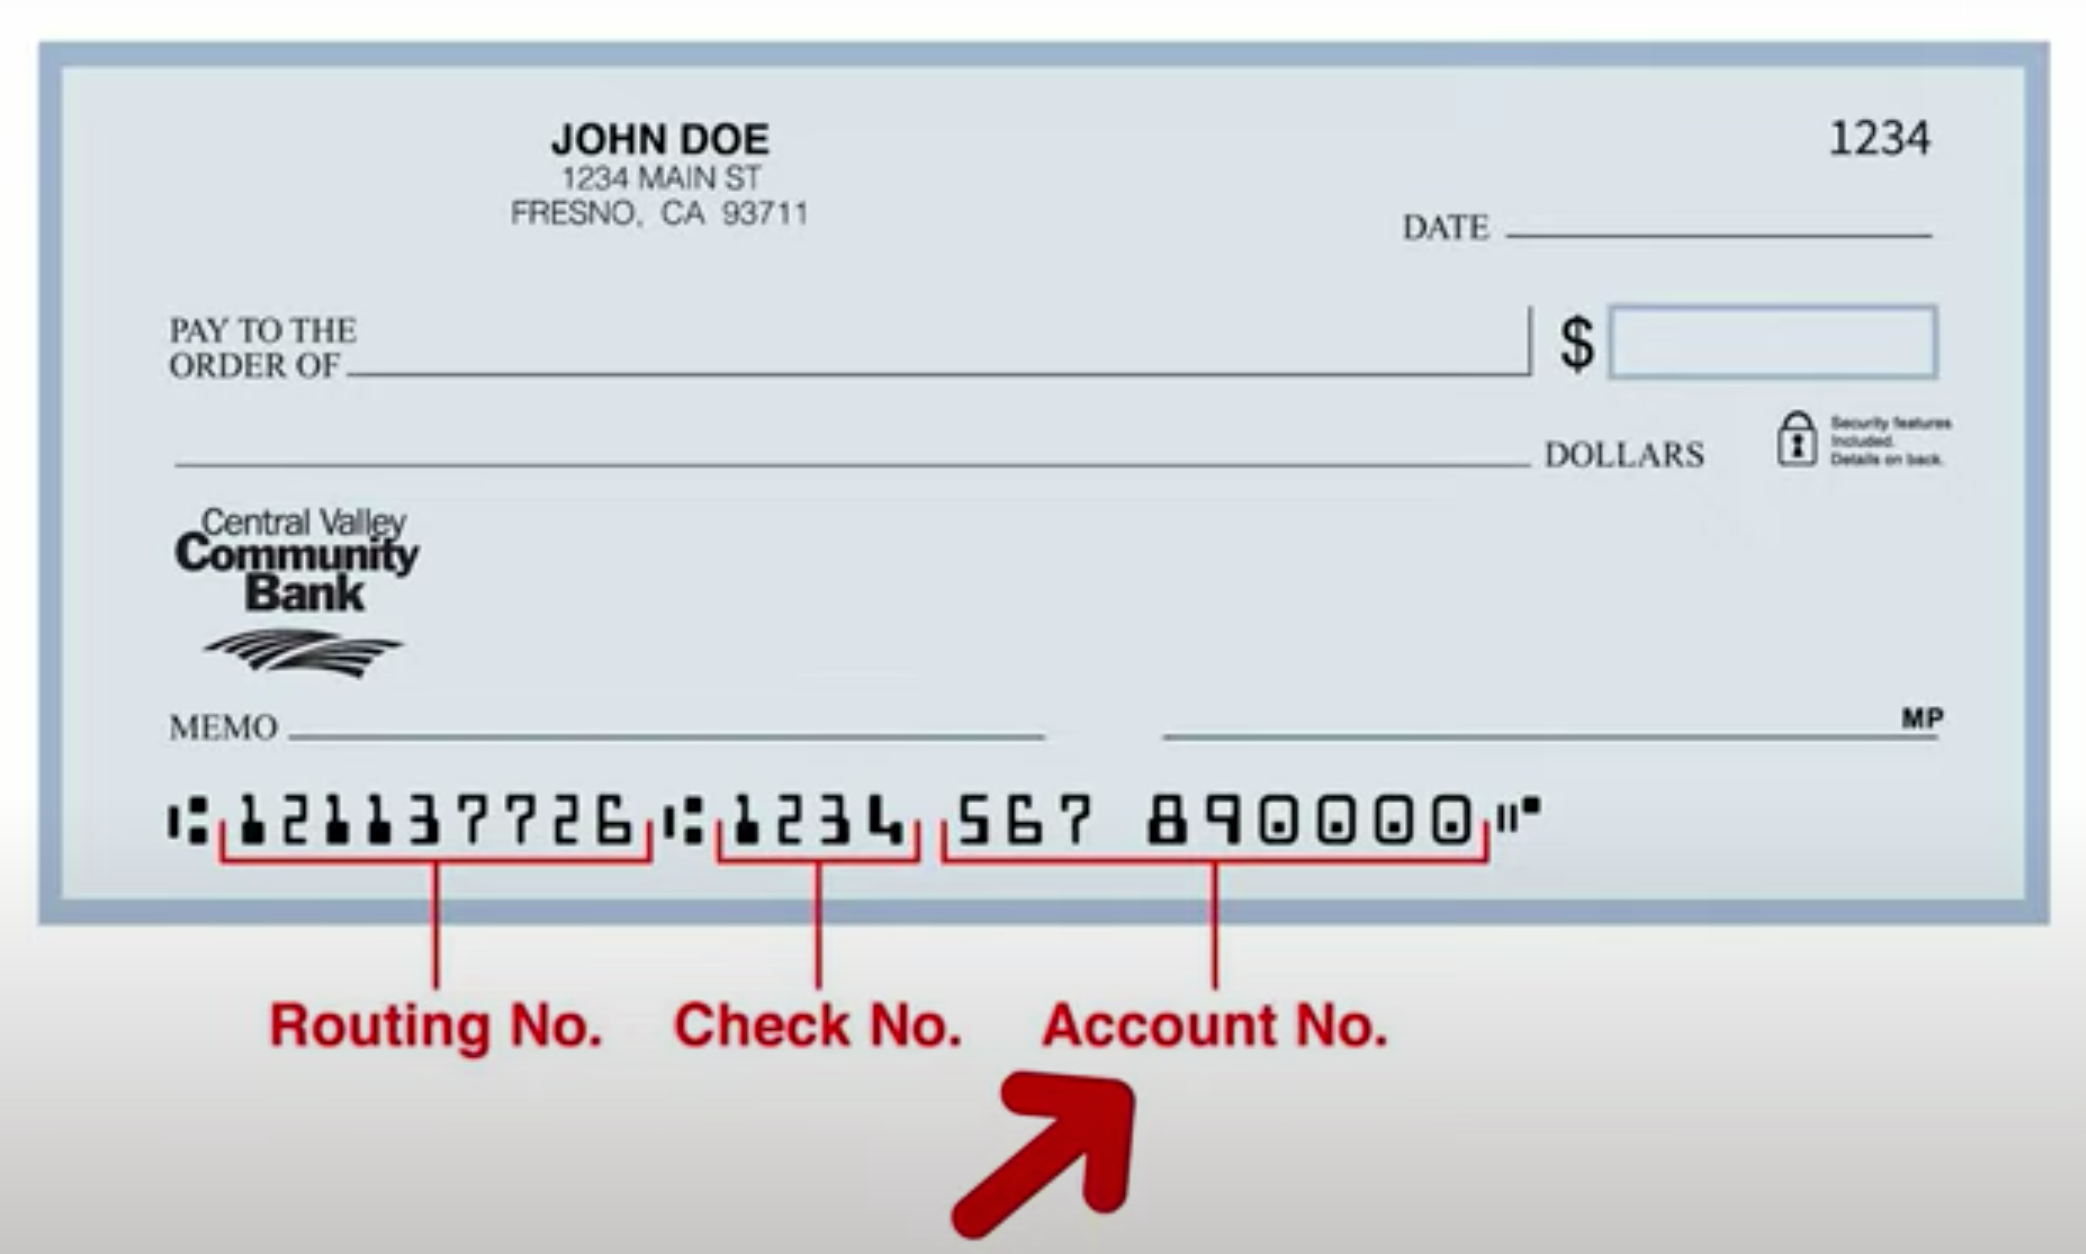
Also, having a valid bank account is crucial for receiving payments from your budding Amazon business.
During registration, you will need to provide your bank account details, including routing and account numbers.
It’s important to note that Amazon only accepts credit cards for payments, not debit cards.
Choose your ‘Business location’ and ‘Business type’
If you are doing these steps to create an Amazon seller account for your own business, then select the appropriate business type. If you’re still not a business owner, then choose “None”. In order to do so, Amazon asks for your name and email. Click OK.
Completing the Amazon Seller Tax Interview
As you progress through the Amazon Seller account setup process, one crucial stage that you’ll encounter is completing the Tax Interview. This step ensures compliance with tax regulations and allows Amazon to accurately report and withhold taxes on your behalf.
Here’s what you need to know:
a. Tax Interview Overview: The Tax Interview is a series of questions that aim to determine your tax-related requirements, including your tax identification number, tax classification, and any applicable exemptions. The tax information that you provide in this interview will enable Amazon to generate the appropriate tax forms and withholdings, if necessary.
b. Interview Questions: During the Tax Interview, you will be prompted to answer a set of questions based on your business structure, location, and other relevant factors. These questions will vary depending on your individual circumstances and the tax regulations of your country.
c. Tax Identification Number (TIN): As part of the interview, you may need to provide your Tax Identification Number, such as your Social Security Number (SSN) in the United States or your VAT ID in the European Union. Ensure that you have this information readily available before starting the Tax Interview.
d. Tax Classification: The Tax Interview will inquire about your tax classification, which is determined by factors like your business structure and the jurisdiction in which you operate. The options may include individual, partnership, corporation, or other applicable classifications.
e. Exemptions and Benefits: If you qualify for any tax exemptions or benefits, the Tax Interview will provide an opportunity to declare them. These exemptions can vary based on your business type, location, and applicable tax laws.
f. Submitting the Tax Interview: Once you have provided accurate and complete information, review your responses before submitting the Tax Interview. Double-check for any errors or omissions that may affect the accuracy of your tax reporting.
Completing the Tax Interview accurately and honestly is essential for maintaining a transparent and compliant selling experience on Amazon. It allows you to fulfill your tax obligations, ensures accurate tax reporting, and minimizes the risk of penalties or legal issues.

In addition to the professional selling plan fees, you need to consider other fees associated with selling on Amazon. Here’s a general overview of the selling plan fees:
Fulfillment by Amazon (FBA) fees: Extra fees for Amazon to handle fulfillment and shipping.
The exact fees may vary depending on the product category.
Also, your monthly Professional account fee
It’s essential to factor in these fees when determining your pricing strategy and profit margins for online business. To ensure a profitable venture, research and analyze the costs of referral fees and handling fees associated with your products.

Once you’re ready to start listing your product, you will need your freshly created Amazon seller central login, to access your Amazon Seller Central account. The home page of Seller Central is where you’ll begin building your Amazon presence (or your Amazon business).
This is actually a huge process that involves research and Amazon-specific knowledge (which the Ecom Optimization blog is dedicated to showing you). However, let’s give you the essentials right now.
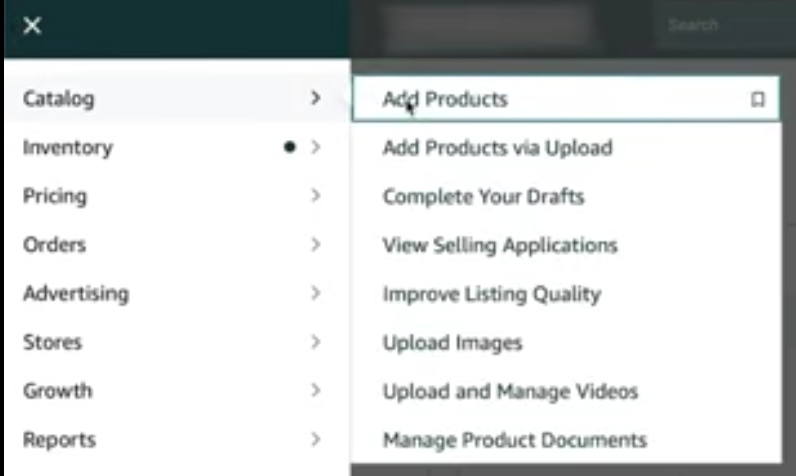
To add your product, click on the catalog tab inside of your Seller Central account and select “Add Products.”
The specific location may vary depending on your Seller Central layout, but the general process remains the same. If you’re add a brand product or a private label product, choose “I’m adding a product not sold on Amazon.”
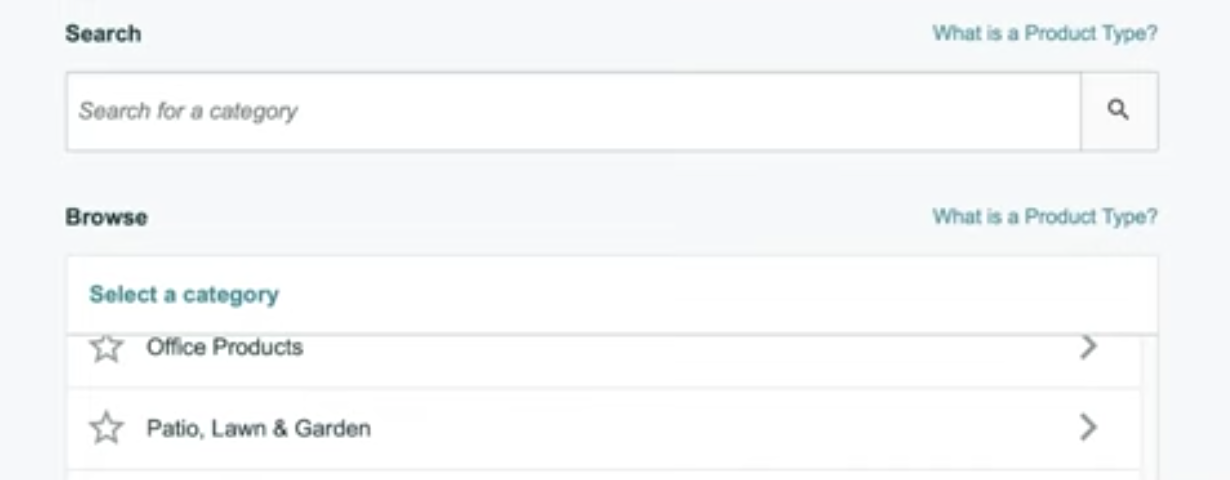
Select the Category
Choosing the right category for your product is crucial for visibility and accurate search results. Take the time to browse through the available categories offered to you inside of Seller Central, and select the one that best describes your product.
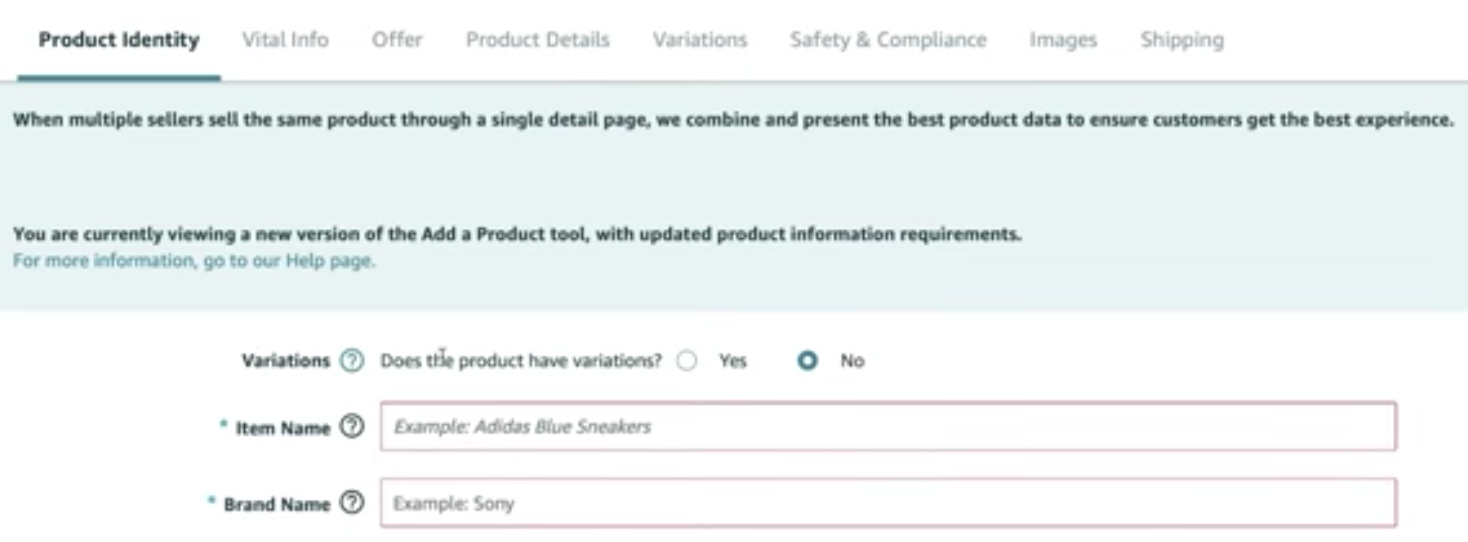
Product Identity
In the product identity section, you’ll need to provide essential product information. If your product has variations such as sizes or colors, mark “Yes”. Even if you don’t have variations at the moment, selecting “Yes” allows you to add them later.
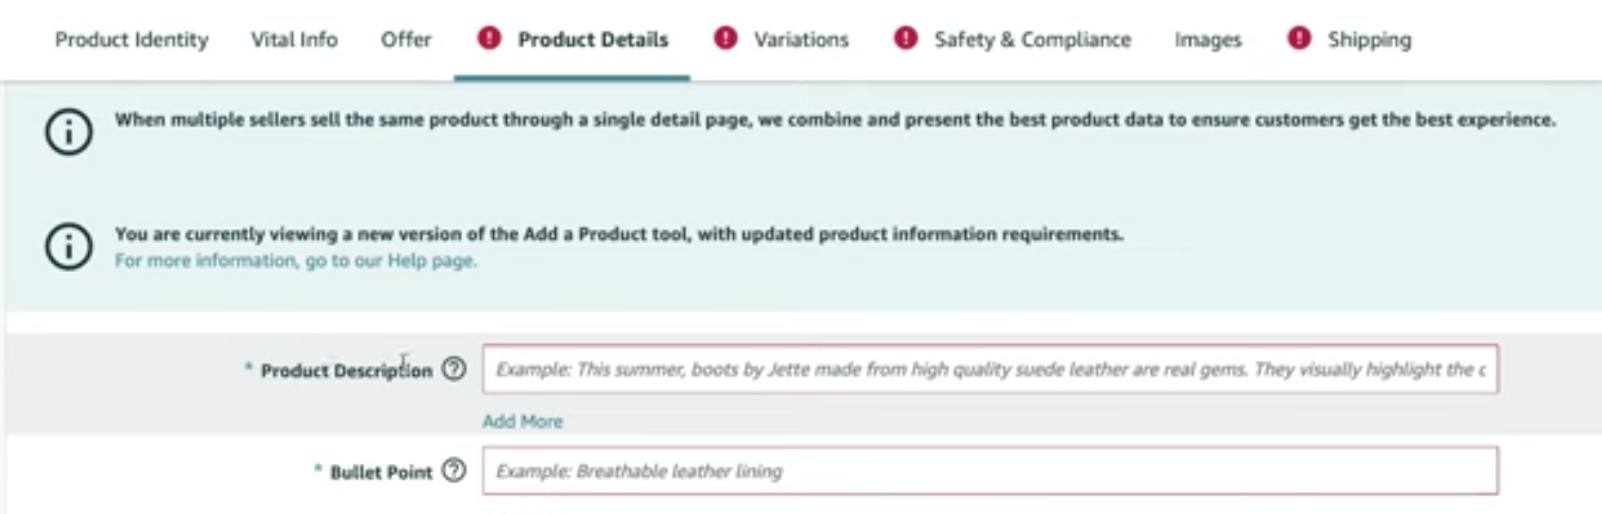
Product Details
This section contains essential details about your product that customers rely on when making purchasing decisions.
It is important to provide accurate and comprehensive information to ensure transparency and customer satisfaction. Let’s explore the key elements of the “Vital Info” section and why they are crucial for a successful product listing.
Product Title
The product title is one of the first things customers check when browsing through Amazon search results. Your title should be descriptive enough to grab attention while offering great keywords for the A10 Algorithm to understand, while still conveying the key features of your product to human shoppers.
A well-crafted title not only helps customers quickly understand what your product offers but also improves its visibility in search results. Include relevant keywords in your title to enhance search rankings, but avoid using misleading information.
Note: Spend the time and research dollars to get a title that will be valuable for years. If not, you could run into The Amazon Title Change Deathpunch
Brand Name
The brand name is an important element of your product listing, especially if you have established brand equity.
Aside from the fact that a strong brand name can build trust, differentiate your product from competitors, and encourage repeat purchases, A trademarked brand on Amazon also opens up huge benefits through Amazon’s Brand Registry – such as A+ Content.
If you don’t have a brand name, you can choose to list your product as a generic item.
Product Variation
If your product has variations such as different sizes, colors, or styles, it is crucial to provide this information accurately.
Variation details allow customers to select their preferred options and make informed purchasing decisions. Ensure that you clearly specify the available variations and provide relevant information for each variation, such as size dimensions, color options, or material types.
Product Description
The product description is an opportunity to provide additional details about your product, its features, and benefits. It should be concise, informative, and engaging. Use this space to highlight unique selling points, explain how your product solves a problem or meets a need, and address any frequently asked questions. While crafting the product description, remember to stay within Amazon’s guidelines and avoid using exaggerated or misleading language.
Product Images
High-quality product images are essential for capturing customers’ attention and showcasing your product’s visual appeal.
Including multiple images that present different angles, close-ups, and lifestyle shots can help customers better understand your product and envision themselves using it. Ensure that your images are well-lit, accurately represent the product, and meet Amazon’s image requirements in terms of size, resolution, and file format.
Product Keywords
Keywords play a vital role in optimizing your product listing for search visibility. Including relevant keywords in your product information helps Amazon’s search algorithm understand the context of your product and improves its chances of appearing in relevant search results. Conduct proper Amazon SEO research to identify the most relevant and high-traffic keywords for your product and strategically incorporate them into your product title, bullet points, and product description.
Other Relevant Information
Depending on the category and nature of your product, there may be additional fields or sections that require your attention.
These could include details such as:
Material composition
Dimensions
Weight
Safety certifications
Assembly instructions.
It is essential to provide accurate and complete information to address any potential customer concerns and comply with relevant regulations or guidelines.
Shipping Options
Choose whether you want to fulfill orders yourself (FBM) or utilize Amazon’s fulfillment service (FBA).
FBA is highly recommended for its convenience and benefits such as Prime eligibility, marketplace visibility, and efficient order processing. Selecting FBA means Amazon handles the shipping and customer service on your behalf (and an insider tip – the A10 algorithm favors FBA listings).
Q: Can I sell on Amazon from any country?
Amazon sellers are allowed to sell from a list of approved countries. You can check the list of approved countries on the Amazon Seller Central website to determine if your country is eligible.
Q: What is the difference between a professional and an individual account?
A professional Amazon account is suited for sellers planning to sell 40 or more products per month and provides access to Amazon PPC advertising. An individual account is ideal for low-volume or occasional sellers and charges a flat fee amount of $1 per product sold.
Q: Can I switch from an individual to a professional account later?
Yes, you can upgrade your individual account to a professional account at any time by going to your Amazon Seller Central account settings. At the time of this writing, downgrading your Amazon seller central account from a professional to an individual account is not possible (though this policy has changed before).
Q: Is there a risk in choosing the professional account if I haven’t sold anything yet?
While the professional account requires a monthly fee, it provides access to valuable selling tools and advertising options. If you haven’t sold anything within a few months, you can request a refund of the monthly fee.
Q: Are there any additional fees besides the monthly subscription for a professional account?
While professional sellers pay a monthly fee of $39.99, additional fees may apply for services such as FBA (Fulfillment by Amazon), referral fees, and variable closing fees. It’s important to familiarize yourself with Amazon’s fee structure to understand the potential costs before you create an Amazon seller account.
Q: What documents do I need for identity verification?
The specific identity verification documents required for a new Amazon seller account vary based on your country and business type. Generally, you’ll need a government-issued ID, such as a driver’s license or passport, and a document verifying your business address, such as a bank statement or utility bill.
Q: Why does Amazon use postcard OTP verification?
Amazon employs postcard OTP verification to enhance security and ensure that only authorized individuals can access and operate an Amazon seller account. This helps protect sellers’ sensitive information, prevent Amazon business fraud, and maintain the integrity of the marketplace.
Q: What if I don’t receive the postcard OTP?
If you don’t receive the postcard within the expected timeframe, double-check the accuracy of the billing address you provided during registration. If the billing address is correct, contact Amazon account support to report the issue and request further assistance.
Q: Can I use an alternate verification method instead of the postcard OTP?
Currently, Amazon primarily relies on postcard OTP verification. However, in certain cases, they may offer alternative methods, such as cell phone verification, to accommodate specific situations. These alternatives are subject to Amazon’s discretion and eligibility criteria.
Q: What documents do I need to provide as an individual seller?
As an individual seller, you will typically need to provide a valid ID document, such as a driver’s license or passport, a bank account statement, and a phone number for verification purposes.
Q: What is the purpose of the Tax Interview in Amazon Seller Account registration?
The Tax Interview aims to gather important tax-related information from Amazon sellers to ensure compliance with tax regulations. It enables Amazon to generate appropriate tax forms and, if necessary, withhold taxes on behalf of sellers.
Q: What if I don’t have a Tax Identification Number (TIN)?
If you don’t have a TIN, consult with a tax professional or the relevant tax authority in your jurisdiction to understand the requirements and obtain the necessary identification number. It is crucial to have a valid TIN for accurate tax reporting.
Q: Can I change my tax information after completing the Tax Interview?
Yes, you can update your tax information even after completing the Tax Interview. Visit your Amazon Seller Central account, navigate to the tax settings, and make the necessary changes. However, it’s advisable to consult with a tax professional before making any modifications to your seller central profile information to ensure compliance.
Q: Can I change my store name later?
Yes, you can change your store name later by going to your Amazon Seller Central account settings. However, keep in mind that frequent changes to the display name (aka. Store Name) may affect your brand recognition and customer trust.
Q: How do I get Universal Product Codes (UPCs) for my products?
UPCs are unique product identifiers required by Amazon. You can purchase UPCs from authorized resellers or apply for a GS1 company prefix to generate your own UPCs. Note: Your Amazon account will now only accept GS1 UPCs. The old buy-UPC-codes-from-eBay hack is now dead.
Q: Can I add product variations later if I don’t have them initially?
Yes, you can add variations to your product listing even if you don’t have them initially. Selecting “Yes” when prompted about variations allows you to add them at a later time.
Q: How important are product images?
Product images play a vital role in attracting and converting customers. High-quality Amazon product images that have the curiosity to get the click, while accurately depicting your product can significantly impact sales. Ensure your images are well-lit, showcase different angles, and represent your product accurately.
Q: Are there any performance metrics I need to maintain as a seller?
Yes, Amazon tracks various performance metrics to ensure a quality shopping experience for customers. Some of the key metrics include the order defect rate, pre-fulfillment cancel rate, and late shipment rate. While it’s important to maintain good metrics, occasional issues are normal, and Amazon provides resources to help you improve.
Q: Can I sell any product on Amazon?
Amazon has certain restrictions on what can be sold on its platform. Some products are gated, meaning you need approval to sell them. Typically, gated products require a manufacturer invoice or other forms of documentation submission inside of your Amazon seller account to demonstrate authenticity. However, many product categories are open for initial selling on Amazon. This means that with your brand new seller account, you can start building your Amazon business with ungated products (such as books) to gain experience and grow) your reputation.
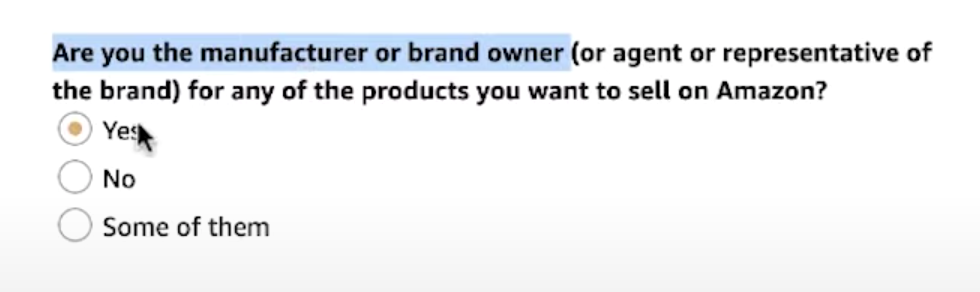
Q: How can I get ungated for specific brands or categories?
Your Amazon seller account may require approval for selling certain products and brands (even if you are the brand owner). If you are the brand owner, you will essentially grant yourself permission to sell your own products vian an Approval letter and some candid photographs of your product. (weird, we know, but Amazon is weird).
If you are not the brand owner, the methods range from using invoices from major retailers (like Kohls) to buying directly from the brand’s website, using Amazon as a wholesale supplier, or purchasing from reputable wholesale suppliers.
Highlights for No-Branded Sellers.
Method 1: Use invoices from Kohl’s, a strategic partner of Amazon, to get ungated on various brands and products.
Method 2: Purchase products directly from the brand’s website and submit proof, such as invoices or screenshots, to Amazon.
Method 3: Utilize Amazon as a wholesale supplier by buying products with a separate account and submitting Amazon’s invoice as proof.
Method 4: Purchase from reputable wholesale suppliers like ee distribution or Christianbook.com, although this method requires a minimum order and doesn’t allow returns.
Keep in mind the ungating process (or any process on Amazon) is not always straightforward, and persistence may be required. It’s important to spend as little as possible per unit and seek assistance from Amazon customer support team, if needed. Once ungated, sellers can access competitive products and opportunities for success on Amazon.
Q: What happens if I violate Amazon’s rules and regulations?
Amazon has strict policies in place to ensure a fair marketplace. Violations, even minor ones, can result in account suspension. It’s essential to familiarize yourself with Amazon’s guidelines and comply with them to maintain a successful selling journey.
Q: Should I choose FBM or FBA for shipping?
While the choice between FBM (Fulfillment by Merchant) and FBA (Fulfillment by Amazon) depends on your business model and preferences, FBA offers numerous advantages such as Prime eligibility, higher product visibility (because of Prime Shopper’s search preferences and A10 bias for Prime Listings), a well as streamlined order processing. It is highly recommended for most sellers.
Q. Can I sell on Amazon without using the FBA program?
Yes, you can opt for FBM if you prefer to handle fulfillment yourself. FBM gives you more control over the shipping process, but it also requires more time and effort on your part.
Can I sell internationally with an Amazon Seller Central account?
Yes, Amazon provides options for selling products in multiple marketplaces across the globe. You can expand your reach and sell in international markets by utilizing Amazon’s Global Selling program.
Q. How can I market my products on Amazon?
Amazon provides various advertising options to promote your products, such as Sponsored Products and Amazon Advertising. Additionally, optimizing your product listings with relevant keywords, attractive images, and compelling descriptions can help improve visibility and sales.


")